The NPX Lab Suite of the BF++ Framework allows you to perform several analyses on many different signals. The results of these analyses should be stored in the files themselves but commonly used file formats do not allow this. For this reason a new file format (the NPX file format) has been developed and implemented in order to allow to add any kind of information to a file without breaking the backward compatibility, which means that all the software tools already available do not need to be modified and will continue to work even if a huge amount of new data are added to a file.
The File Converter is a tool that allows you to convert many different file formats (EDF, BCI2000, GDF, Neuroscan, Brain Vision Analyzer, EBNeuro, Micromed, CTF MEG, ASCII, Microsoft Wave, etc...) from their native format to the NPX one (and ASCII, Brain Vision Analyzer and EDF).
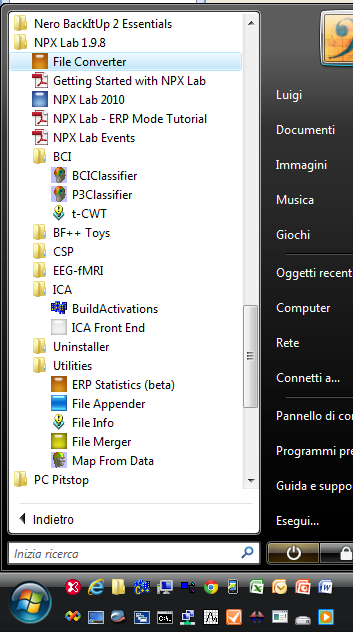
After having launched the application from the NPX Lab menu

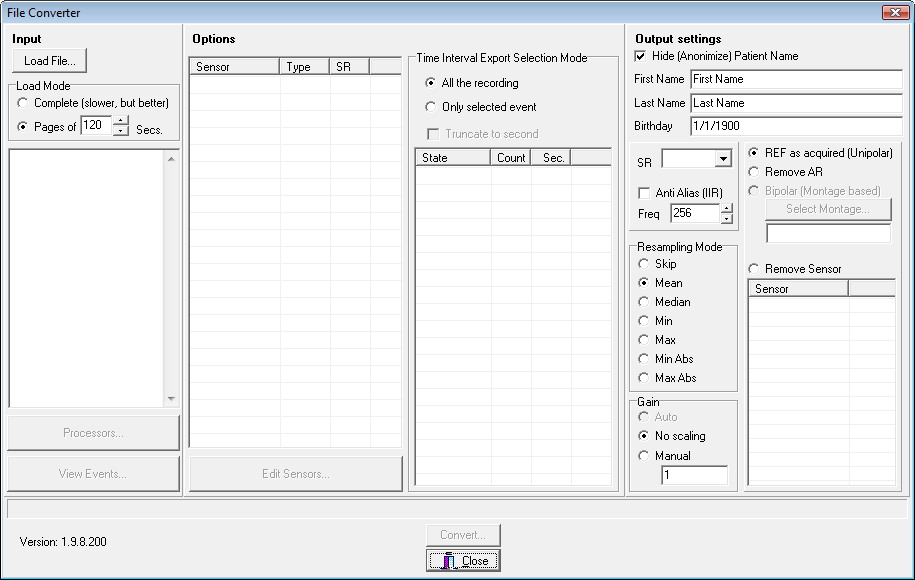
the following Form will be shown.

Then, you have to open a file (press the Load File… button on the top left of the form) to select the file you want to convert.

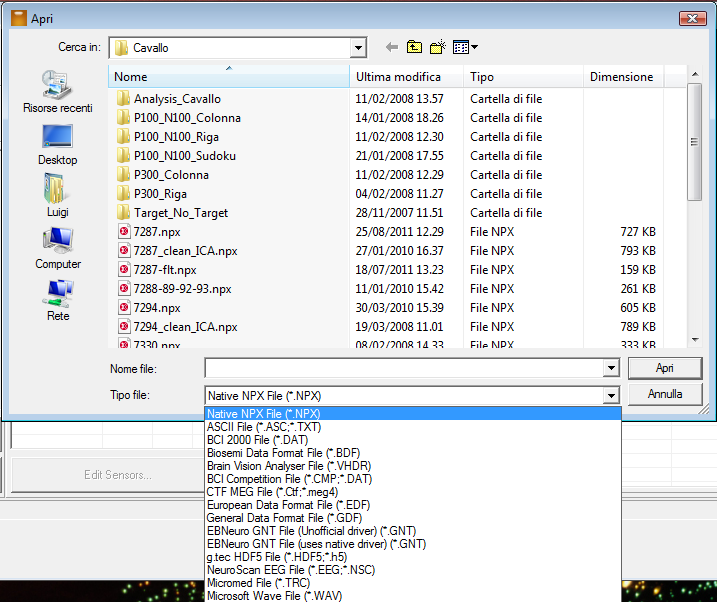
It is necessary to select the proper file format (several file formats are supported) and then the file name.
Then, depending on the file format, two different events might occur:
1) Another Dialog Box will be shown, which allows to set some parameter that have to be defined before the conversion (e.g. ASCII files: where is stored, if it is, the number of samples and/or the sampling rate?).
2) The data are loaded. Please note that depending on the file format this operation could be long: in the case of CTF MEG data, for example, samples are stored in big endian mode and they need to be converted into little endian. Also all the data should be loaded completely because the mean values are subtracted from each sensor.
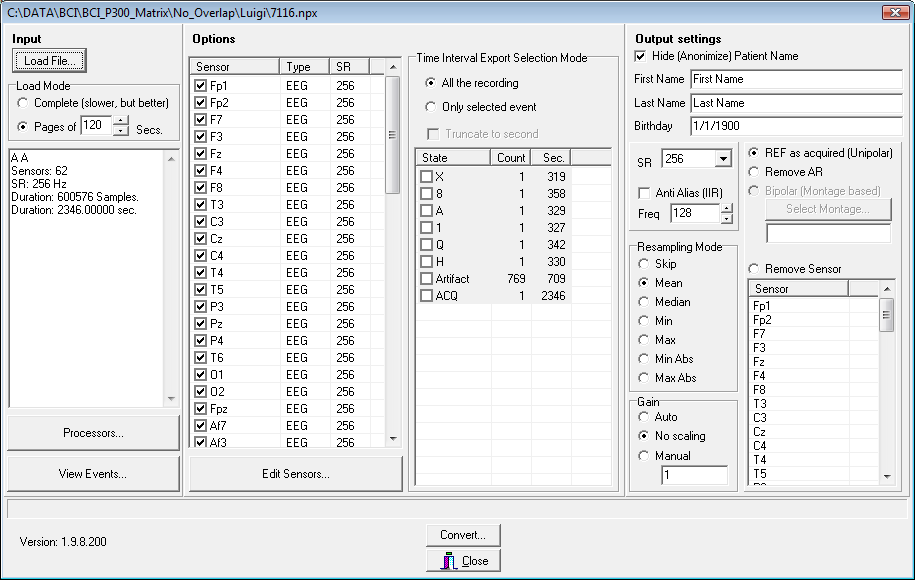
After the file has been opened, many controls of the main form will be filled with some data extracted from the file itself, such as the sampling rate, the events, the sensors, etc.. Also data can be downsampled and resampling can be done according to 7 different options (Resampling Mode radio group) and/or only a portion of the file can be converted (Time Interval Export Selection Mode group). Finally, the name of the subject can be hidden (for privacy reasons) and all the available processing can be applied to the output file, such as IIR and FIR filtering, ICA source computation, Spatial filtering, etc…

If some of the sensors information are not available (e.g. there are file formats that do not store the sensor name!) by pressing the “Edit Sensors…” button a form will be shown that allows you to rename the sensors labels (click on a selected item in the left list and type the new label name), set the type (use the Set Type groupbox for this) and set the coordinates of the sensors according to a grid (useful for ECoGs recordings).
Note that this utility can also be used to convert a NPX file into another NPX file, and that it is possible to remove channels, filter the data, etc…
After a data file has been converted it can be opened and viewed with the NPX Lab software tool. Note that the NPX Lab can actually read any of the file format that can be handled by the File Converter, but be aware that all the capabilities of this tool are available just with the NPX data files. So, in general, it is recommended to convert a data file into the NPX format before opening it with the other tools.
Created with the Personal Edition of HelpNDoc: Free EBook and documentation generator